Creating a Self-Signed Wild Card SSL Certificate for Your Development Environment
05 Mar 2015 | Security
Secure Socket Layer (SSL) is a security standard used to ensure secure communication between a web server and browser and used in most modern web application. As a developer it is prudent to setup your development environment to closely resemble production as much as possible, including security concerns. However, getting a full fledged CA SSL certificate for you development environment might not be the most cost-effective solution. Therefore post summarizes the steps I take to create a self signed wild card certificate to be used in the internal environments. My guide is based on this excellent post.
Create the Certificate
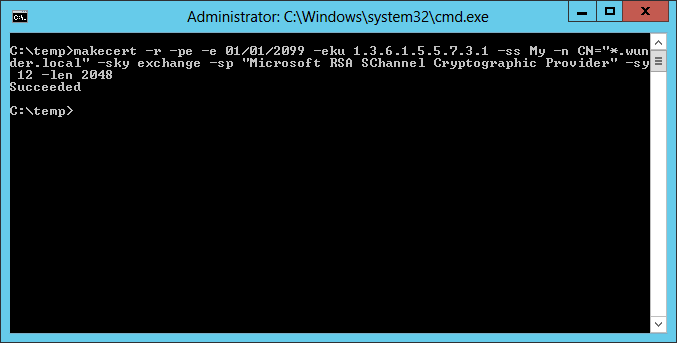
In order to create the certificate we would be using the MakeCert.exe tool which can be found at C:\Program Files (x86)\Windows Kits\8.1\bin\x64\. This command creates the certificate and adds it to the logged in user's personal certificate store:
makecert -r -pe -e 01/01/2099 -eku 1.3.6.1.5.5.7.3.1 -ss My -n CN="*.wunder.local" -sky exchange -sp "Microsoft RSA SChannel Cryptographic Provider" -sy 12 -len 2048
Some of the notable flags:
- -r - Indicates that we're creating a self-signed certificate.
- -pe - Includes the private key in the certificate and makes it exportable.
- -e - The validity period of the certificate.
-n - The subject's certificate name - specify the wildcard url.
Verify Creation
- Open a new
Microsoft Management Console (mmc.exe). - Add the
CertificatesSnap-In forMy Account. Under the
Personalnode, ensure that the newly created certificate exists.
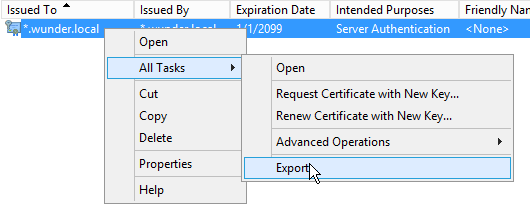
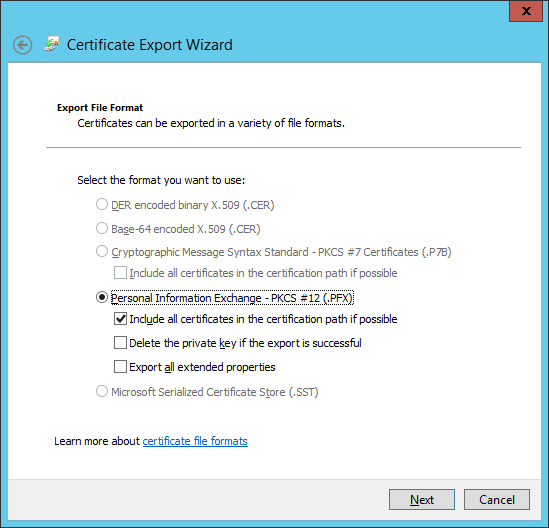
Export Certificate
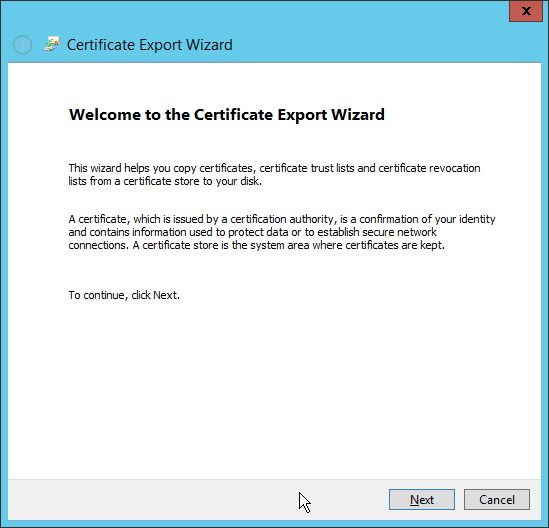
Next we export the certificate, one with the private key (pfx) and one without (cer).
Within the same snap-in, right click on the certificate and select export.
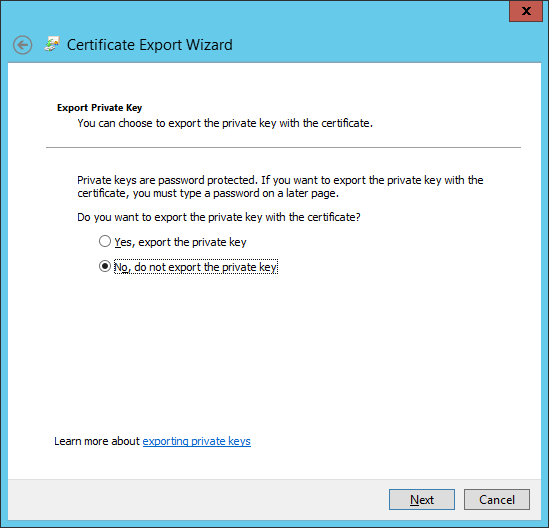
Select the option to export the private key.
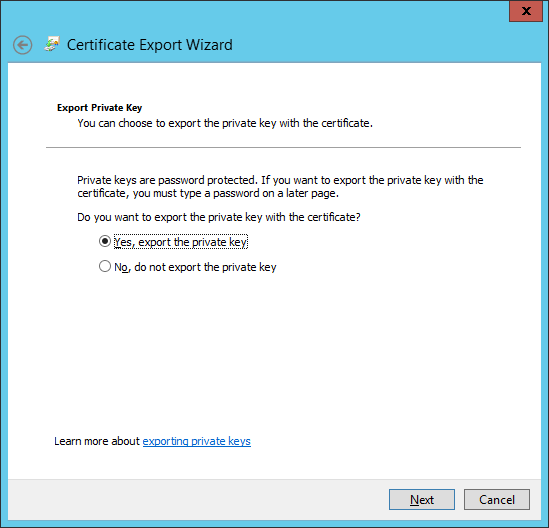
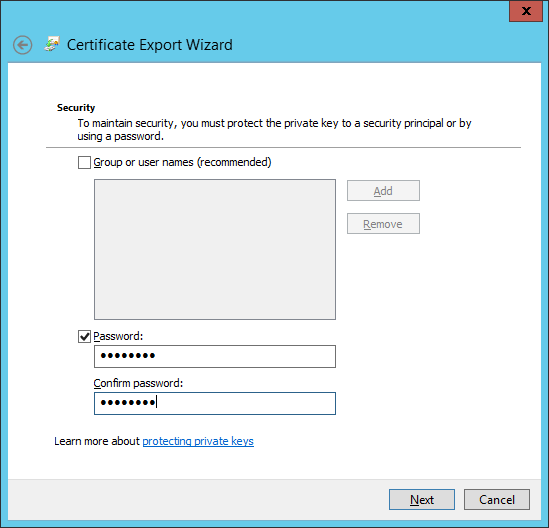
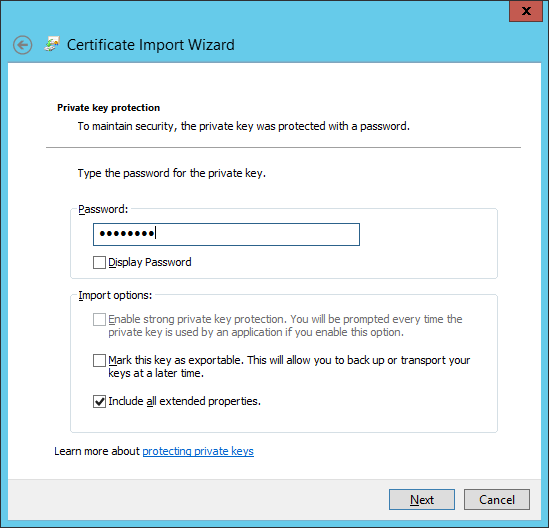
Provide a password to protect the private key.
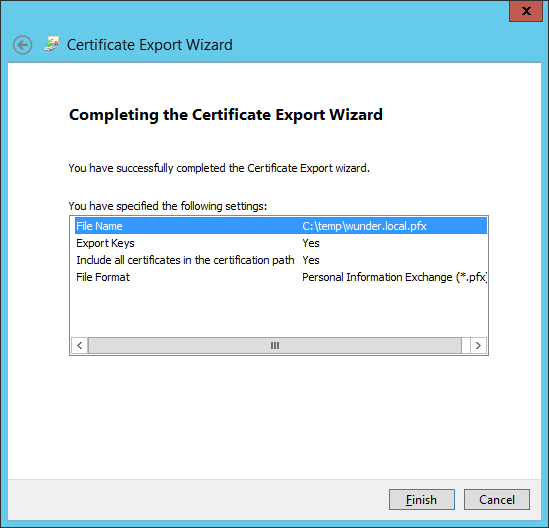
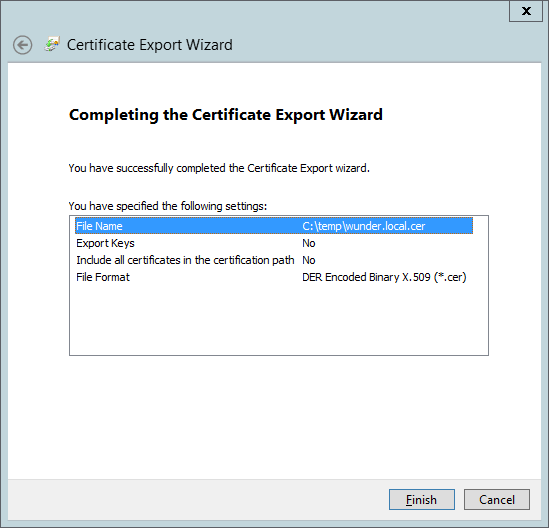
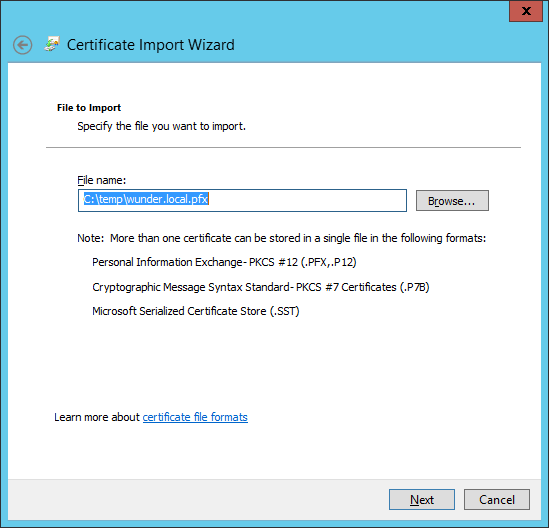
Provide a location to export the file.

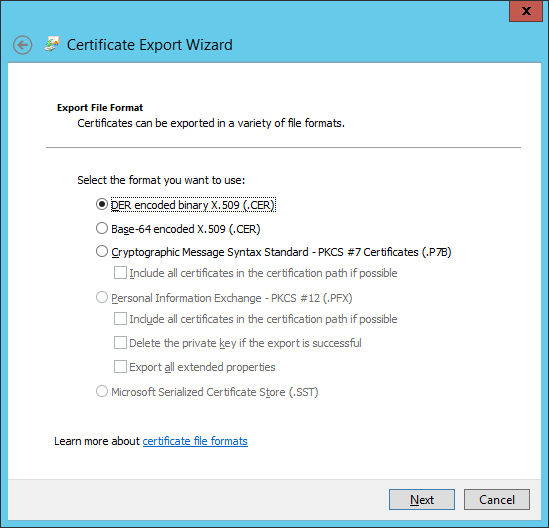
Next let export the (.cer) file. Let's repeat the steps 1-4 but this time opting out of exporting the private key.

Installation
Now, we install the pfx on the web server and each of the client machines consuming the web application.
Web Server
The easiest way to install the certificate is to right-click the certificate within explorer and select
Install PFX.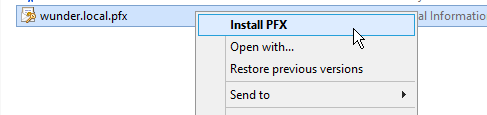
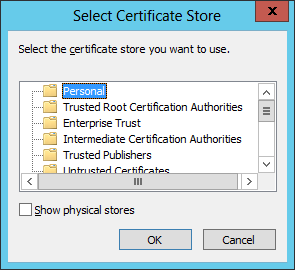
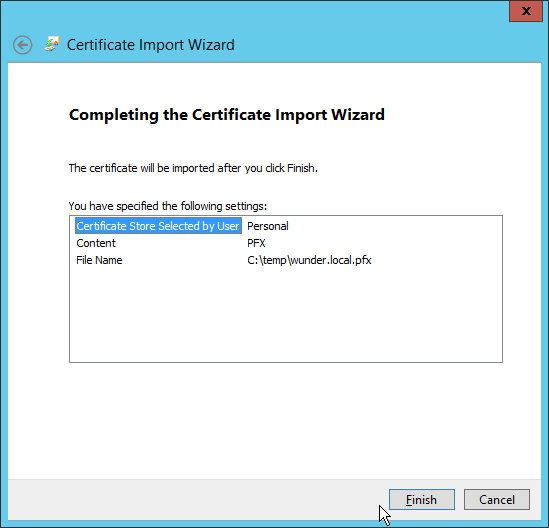
This would launch the Certificate Import Wizard. Select the
Local Machineas the certificate store.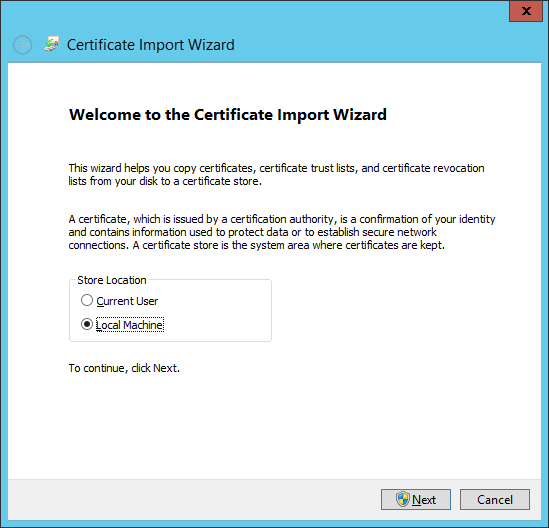
Provide the password for the private key.
Ensure that the certificate is installed under the
Personalstore.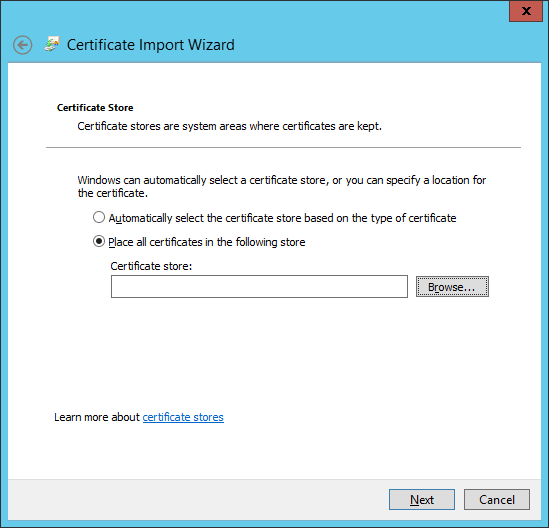
Navigate to Internet Information Services (IIS) Manager and make sure that the certificate is visible.

Bind the certificate to the SSL Port and configure the web application as necessary.
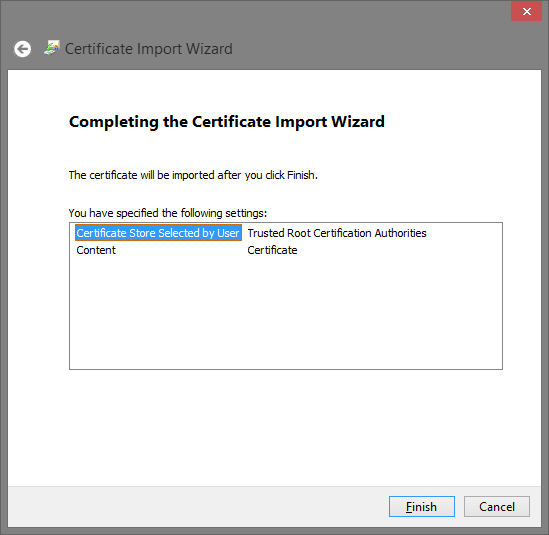
Client Machines
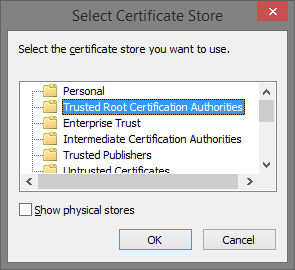
Each of the client machines accessing the web application would have to trust the new certificate. This is done by adding the certificate to the the Trusted Root Certification Authorities store.
On the client machine, right-click the certificate and selecting
Installfrom the menu. On the wizard select theLocal Machineas the store.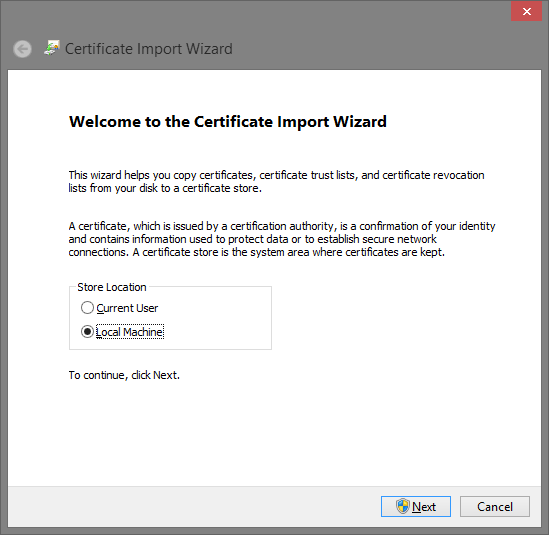
Add the certificate to the
Trusted Root Certification Authoritiesstore.
Final Thoughts
- As suggested in the original article, this would be a good time check-in the certificates into source control so that the entire development team has access to the same files.
- While
Makecert.exewas used to create the certificate, there are other options such as OpenSSL that would work just the same.
References
- Configuring an ASP.NET project for development with SSL
- Technet - Faisal (Sal) Bawany’s TechNet Blog - How to create a self-signed Wildcard SSL Certificate
- MSDN - Makecert.exe (Certificate Creation Tool)
- Difference between MakeCert and OpenSSL wrt C# SslStream
- StackOverFlow - What's the difference between the Personal and Web Hosting certificate store?