Gated Check-ins in Visual Studio Team Services using TFSVC and Git
15 May 2017 | Visual Studio Team Services | TFSVC | ALM | Git
A continuous integration build ensures that the code within a source control repository can be compiled successfully after a commit. It is defined as:
Continuous Integration (CI) is a development practice that requires developers to integrate code into a shared repository several times a day. Each check-in is then verified by an automated build, allowing teams to detect problems early.
Where as CI builds occur after a commit has been merged into the repository, a gated check-in is a "pessimistic" process that would treat a commit as completed only if the result of it being merged with the repository is a successful build.
In this post I will try my hand in setting up a gated check-in using Visual Studio Team Services (VSTS). I will start off with TFSVC as the underlying version control system and then replicate the same functionality using Git.
Configuring a Gated Check-In Using TFSVC
Prerequisite: A repository already exists in the remote server with project code checked-in. I will be using one of my demo CRM projects.
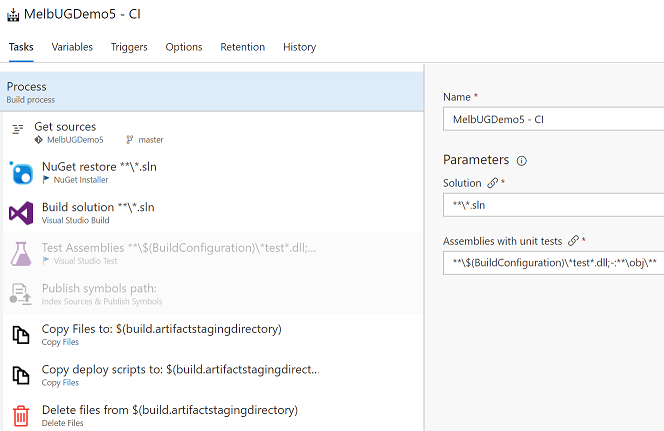
Define the steps for the build that would act as the verification build.
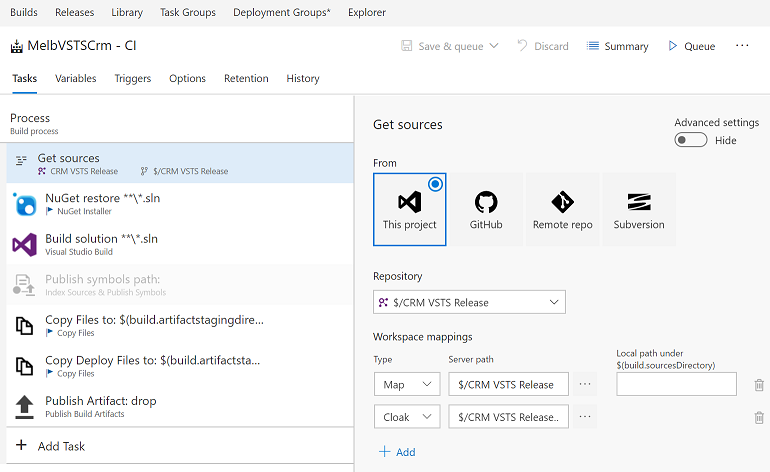
Navigate to the
Triggerstab within the build definition and enabling theGated Check-Intrigger.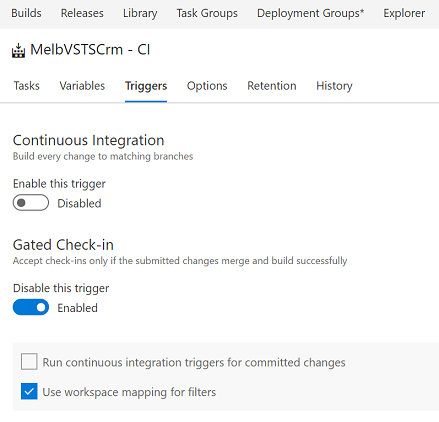
- Leave the
Run continuous integration triggers for committed changesunchecked. If a CI build has been configured and this option was checked then an additional CI build would run after a successful gated check-in build.
Testing Out the Process
- Make a change to the code that causes an compilation error.
Check-in this code into the version control. Upon clicking the
Check Inbutton within Visual Studio, the following warning dialog appears indicating that the new check-in would be stored as a shelveset until its successful completion: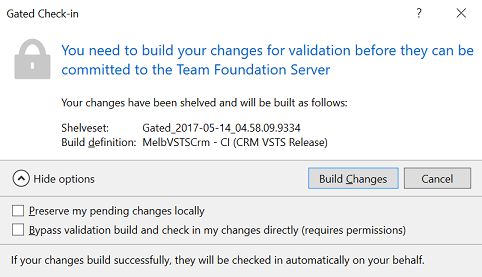
Uncheck the
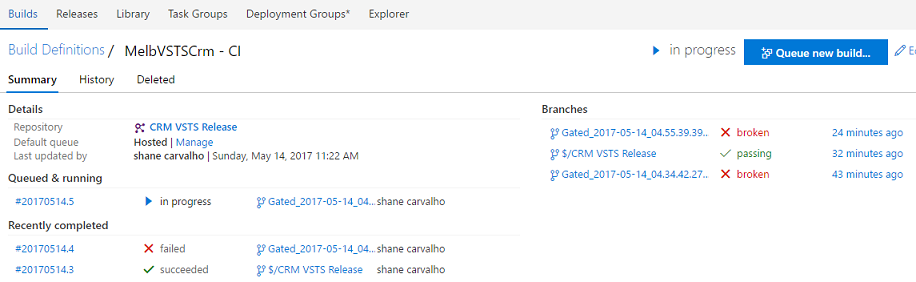
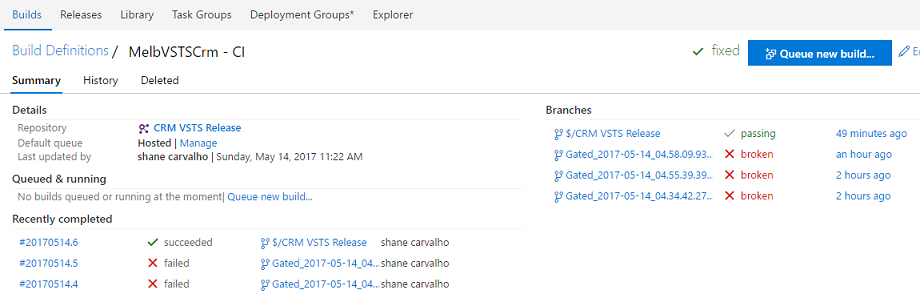
Preserve my pending changes locallyoption and click on theBuild Changesbutton to kick off the build.Next, navigate to builds definition folder and confirm that the verification build was in fact triggered and that it failed as expected.
Since we did not opt-in to preserve our check-ins locally, let's retrieve it from the generated shelveset. Back in Visual Studio, navigate to the
Team Explorerwindow and from theActionsmenu click theFind Shelvesets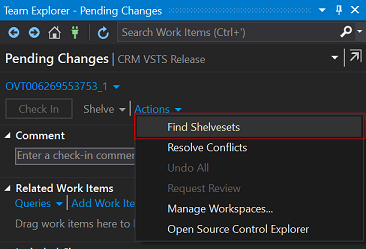
Select the last shelveset that failed the build - it would be prefixed with
Gated_.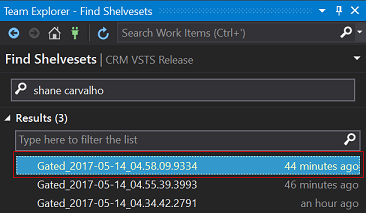
Fix the compilation errors we introduced previously and check in the changes.

Verify that the new check in and resultant gated-build is successful.
Now that the check-in has been merged, get the latest version of the code using Visual Studio.
Configuring a Gated Check-In Using Git
Branch Policies are used to implement gated check-ins in git. It is a feature in VSTS that provides rules to govern the activity within a branch and ensure the code quality and change management standards are followed.
There are many policies available but I am interested only in the ones related to when a pull request is made.
Given the way that git operates, it cannot be configured to have a gated check-in against every commit as we did with TFSVC. Instead the policy would be enforced during the pull requests between the topic branch to the master branch.
The following steps describe the process of setting up a gated check-in on the master branch:
Prerequisite: A repository already exists in the remote server with project code checked-in. I will be using one of my demo CRM projects.
Start off by defining a build that would act as the verification.
Navigate to the repository.
- Click on the
Branchesmenu. Click on the ellipsis against the
masterbranch and on the menu and selectBranch Policies.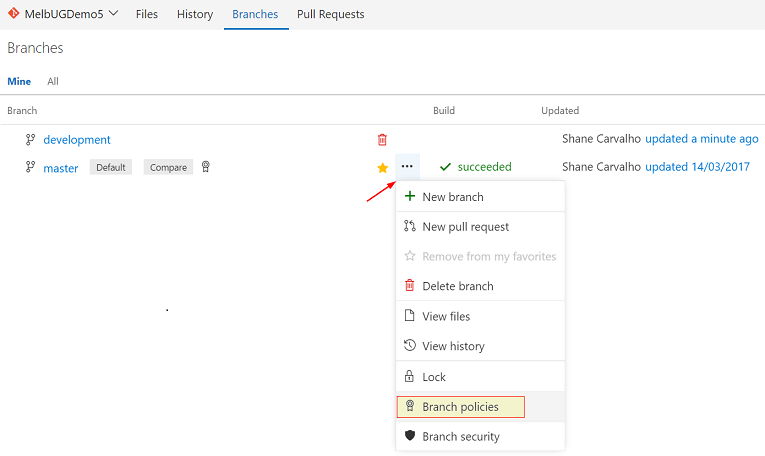
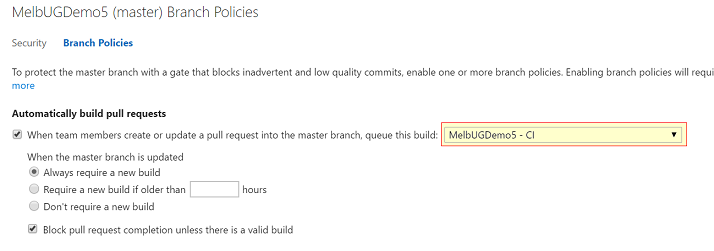
Under the
Automatically build pull requestsmenu check theWhen team members create or update a pull request into the master branch, queue this build:option.Then select the build that you want to use to perform the verification.
Click
Save Changesbutton to confirm the changes.
Testing out the Policy
Now let's test our branch policy:
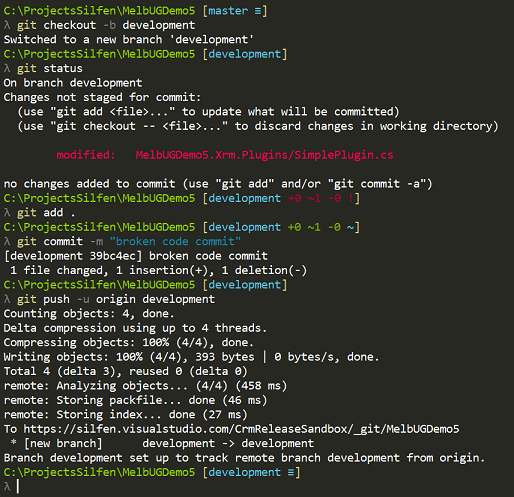
- On the development machine, create a new local branch called
development. - Commit a change that causes a compilation error.
Push the branch and changes to the remote repository.
Next, log into VSTS and navigate to the
Branchesmenu.- Click on the ellipsis against the
developmentbranch to open up the context menu. Select the
New pull requestoption.
Provide a meaningful
TitleandDescriptionand click on theCreatebutton.
Confirm that a new verification build has been queued for the pull request.
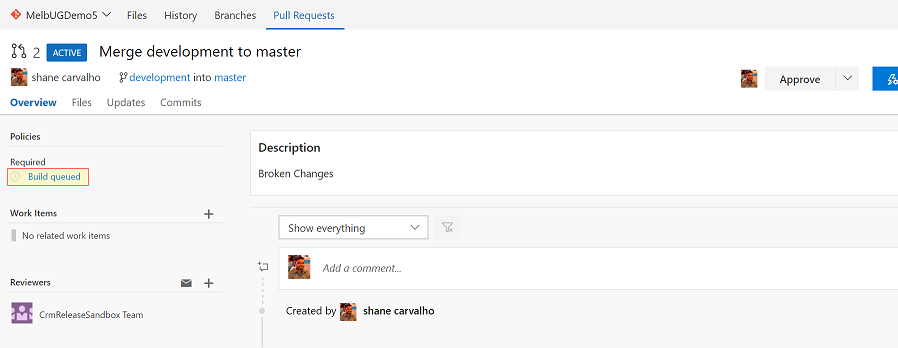
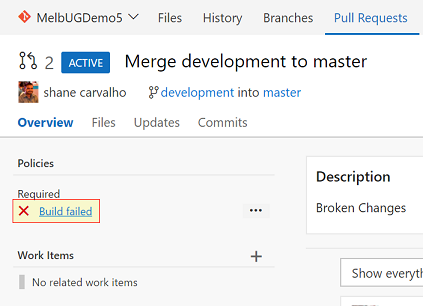
Confirm that this build failed.
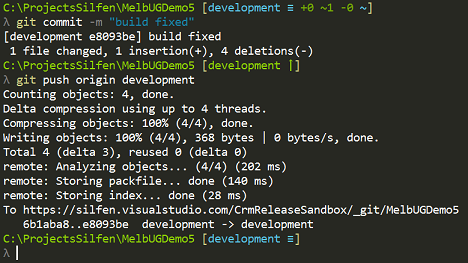
Now let's fix the code, commit and push the change in to the repository.
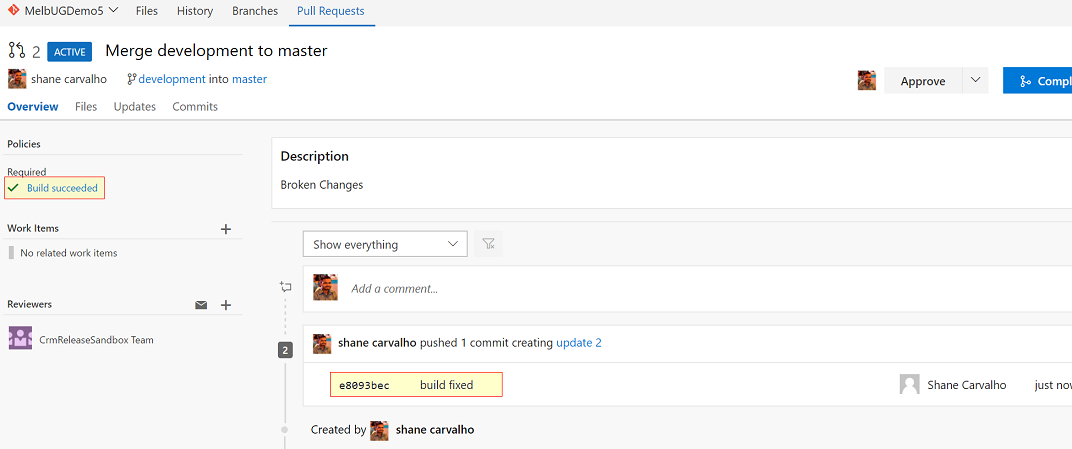
Verify that the build policy has detected the new commit and automatically associated it with the pull request.
Confirm that a new build was triggered as a result and that its successful. The successful build completes the pull request.
References
- Continuous integration | ThoughtWorks
- Build definition triggers
- Check in to a folder that is controlled by a gated check-in build process
- Git Branches and Policies in Team Foundation Server 2015 | Visual Studio 2015 Final Release Event | Channel 9
- Gated checkin for Git: Using Branch Policies to run a build in VSTS and TFS – Buck Hodges
- Protect your Git branches with policies | Team Services & TFS