Configuring Raspberry PI Zero + LCD Display + Tmux
17 Mar 2019 | Raspberry-Pi | Linux | Tmux
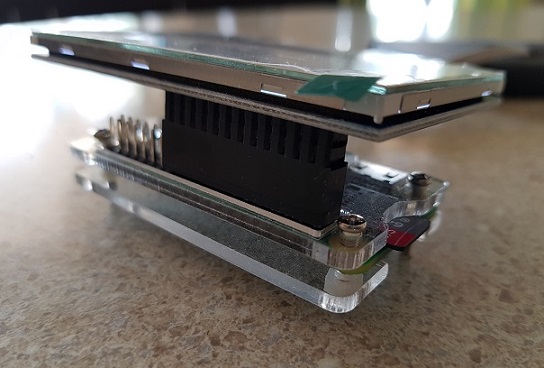
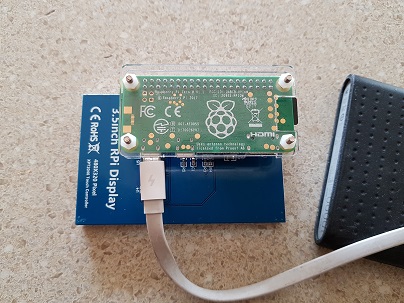
I needed a display for a new project that I am working on and saw that the 3.5 RPI Display Board was on sale and decided to pick one up. I've previously used mini OLED displays before, but they're pretty limited by its size and the colors that it can display. This is a 480x320 resolution device that is designed to affix right onto the Raspberry Pi (RPi) GPIO pins. The installation is simple as you'd imagine:
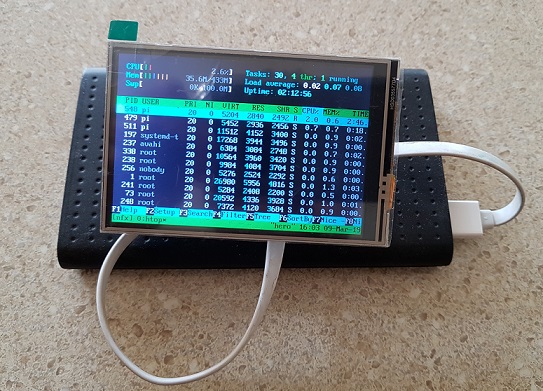
For the project I had in mind, I do not need a fancy GUI nor the use of the touch controller. The display will be used to show console statistics and accessing the device using SSH.
Install and Configure LCD Show
I am using a vanilla Raspbian lite and no additional drivers were required to get this working. All we need to do is configure some boot scripts and introduce some new configuration files. It's possible to do this manually, but thankfully LCD-Show automates the process for us.
Installation of LCD-Show and switching between displays is pretty straight forward:
- Clone the repository.
git clone https://github.com/goodtft/LCD-show.git - Give the new folder execute permission.
chmod -R 755 LCD-show - For my version of the display I need to use the LCD 35 version of the file. Run the
LCD35-showscript. - Reboot the Pi using
sudo shutdown -r noworsudo reboot.
Upon reboot the LCD panel should be your primary display.
It would have been nice if I could have mirrored the HDMI output and the LCD panel at the same time, but I could not figure out how to do this or if it was possible at all.
In order to flip back to HDMI as the primary, execute the LCD-hdmi script and reboot to take effect.
Automatic Login
In order to show console of my program on screen we need to login as a user and I want this to happen automatically at boot time.
I followed the instructions in this post in order to configure auto login on boot:
- Edit the
/etc/systemd/logind.conffile and uncomment the#NAutoVTs=6line toNAutoVTs=1 - Create a new file at
/etc/systemd/system/getty@tty1.service.d/override.conf. Add the following content:
[Service]
ExecStart=
ExecStart=-/sbin/agetty --autologin appsvcuser --noclear %I 38400 linux`
Replace the autologin parameter value with the user you would like to login. In my scenario there is no possibility to physically access and compromise the device, even then I would recommend to use an account with the least amount of privileged to accomplish your tasks.
- Start the
getty@tty1.serviceservice usingsystemctl enable getty@tty1.servicecommand. - Reboot using
sudo shutdown -r noworsudo reboot.
Configure Tmux
I initially attempted to configure it using this approach, but quickly realised that it would not work for my requirement as there is no user logged into the console. If there's no one logged in then there's shown on screen.
My solution is to use terminal multiplexer like Tmux. Among its many useful features, there are a couple of that I am interested in. The first being the fact that a SSH session initiated via Tmux does not terminate upon user disconnection and all your processes continue to run in the background.
Secondly, it allows a remote user to connect to an existing SSH session. If I were to kick off a Tmux session on user log on, I am be able to connect to the same session from a remote computer. This means that I should connect to the session that is being shown on the physical display and interact with it as if I was seated in front of it.
I updated the~/.bashrc of the appsvcuser in order to launch Tmux on logon. I also used the technique described on this post to make sure that only one instance of Tmux always running at a given time.
- Login as the execution account -
appsvcuserin my example. sudo nano ~/.bashrcScroll all the way to the bottom of the file and paste the following block of text:
if [[ `tty` == "/dev/tty1" ]] && [[ -z "$TMUX" ]];then
        tmux new -s "nfx"
fi
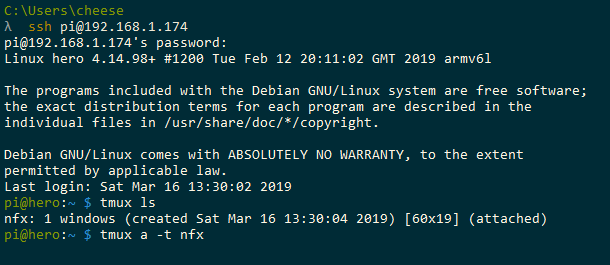
Connecting to the Tmux session:
- Remote into the RPi via SSH.
- Use the
tmux lscommand to get a list of all the sessions running in the background. - The connect to the running session
tmux a -t nfx.
Final Thoughts
Right now the display is on all the time, I would need to figure out a way to timeout or turn it off manually.
The LCD is compatible with both the Raspberry PI Zero and its big brother variants so these same instructions can be applied to get them both running.
References
- GitHub - goodtft/LCD-show: 2.4" 2.8"3.2" 3.5" 5.0" 7.0" TFT LCD driver for the Raspberry PI 3B+/A/A+/B/B+/PI2/ PI3/ZERO/ZERO W
- Automatically Login on Debian 9.2.1 Command Line - Unix & Linux Stack Exchange
- Loading tmux on Boot in Linux – Kernel Panic
- tmux - ArchWiki
- getty - ArchWiki
- tmux cheat sheet
- XPT2046 Touch Screen instructions for Raspbery Pi 3 - Raspberry Pi Forums
- Calibirating the touch screen