Release Strategy for Dynamics CRM - Part 2 - Setting Up the Build
12 Nov 2016 | Dynamics CRM | Dynamics CRM Online | generator-nullfactory-xrm | Visual Studio Team Services | Team Foundation Server | ALM
This is the second of a three part series in which I walk through setting up a release management strategy for Dynamics CRM.
- Release Strategy for Dynamics CRM - Part 1 - Preparation
- Release Strategy for Dynamics CRM - Part 2 - Setting Up the Build
- Release Strategy for Dynamics CRM - Part 3 - Setting Up the Release
- Release Strategy for Dynamics CRM - Part 4 - Versioning
In first part of the series accomplished the following:
- Setup the project structure using the
nullfactory-xrmyeoman generator. - Download the CRM solution from the remote server and unpacked it using the solution packager tool.
- Checked-in all the artifacts back into Visual Studio Team Services (VSTS) source control.
In this post I describe the steps required for setting up a team build. One of the goals with the generated project structure was to have it work with team builds with the least amount configuration.
Setting Up the Team Build
Navigate to the
Build and Release > Buildsfrom within the VSTS team project.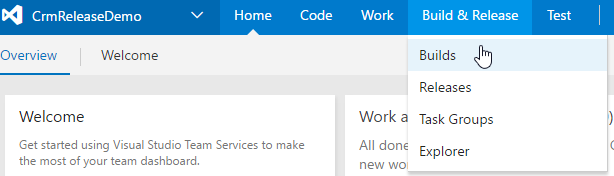
Create a new build definition using a vanilla
Visual Studiotemplate.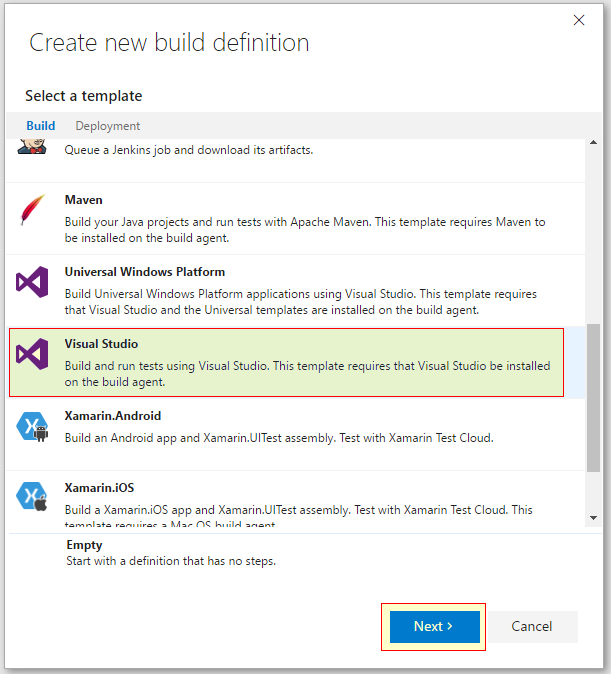
If you want to use the artifact from this build as part a release deployment, then we need to explicitly copy the deploy scripts into the artifact staging folder. Let's do this by clicking on the
Add Taskand selectingCopy Filestask and licking theaddbutton.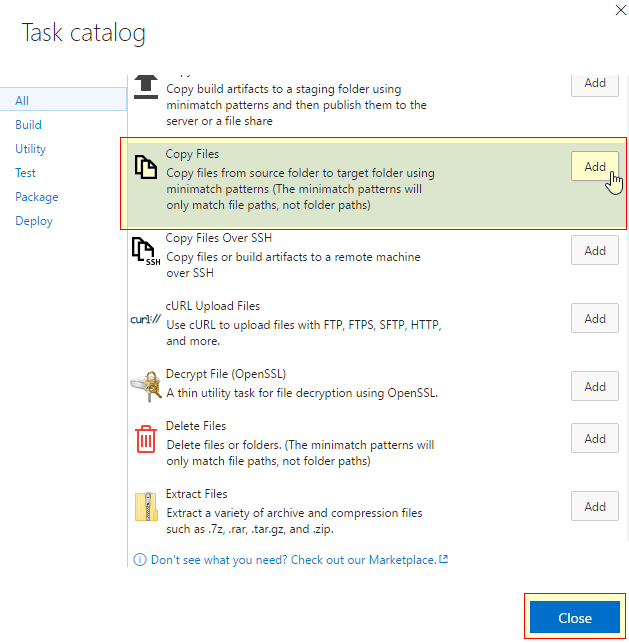
This explicit copy is required because the
Nullfactory.Xrm.Toolingis not designated to build as part of the solution.Next let's configure the task with the following parameters:
- Source Folder -
$(build.sourcesdirectory) - Contents -
**/Deploy-*.ps1 - Target Folder -
$(build.artifactstagingdirectory) - Change the name of the task into something more meaningful -
Copy Deploy Scripts to: $(build.artifactstagingdirectory)
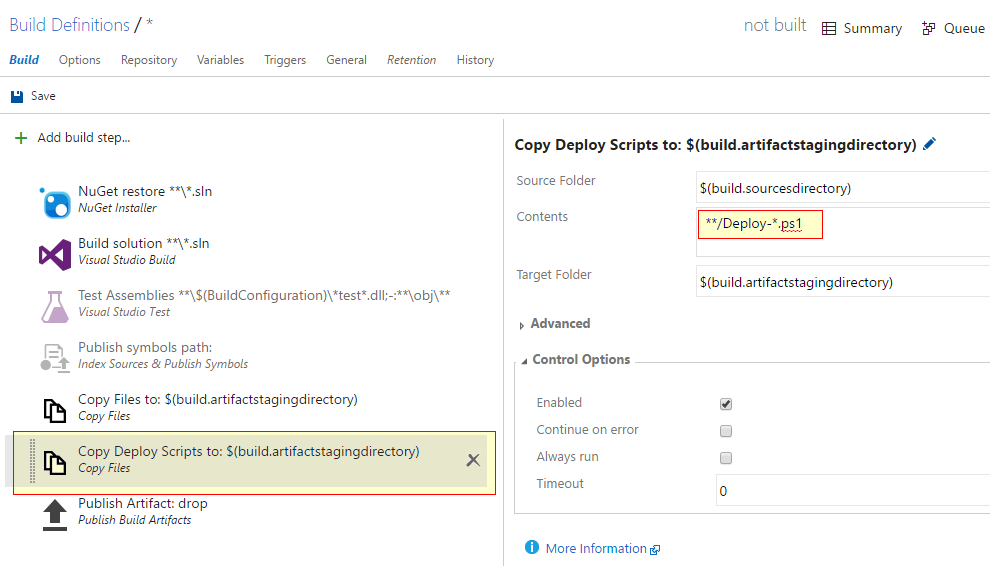
- Source Folder -
Make sure that the newly added task is set to execute before the
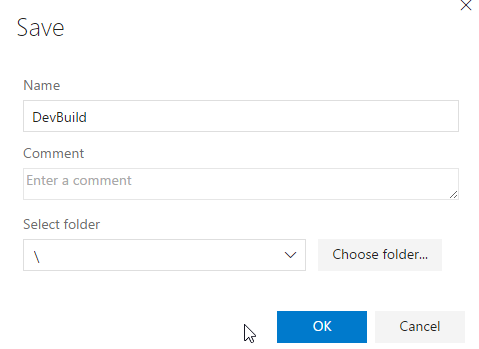
Publish Artifact: droptask.Save and provide the new build a name.
Now let's test it out by queuing a new build.
Once the build is complete, navigate to the artifacts and explore the drop folder to verify that all the required file have been copied .
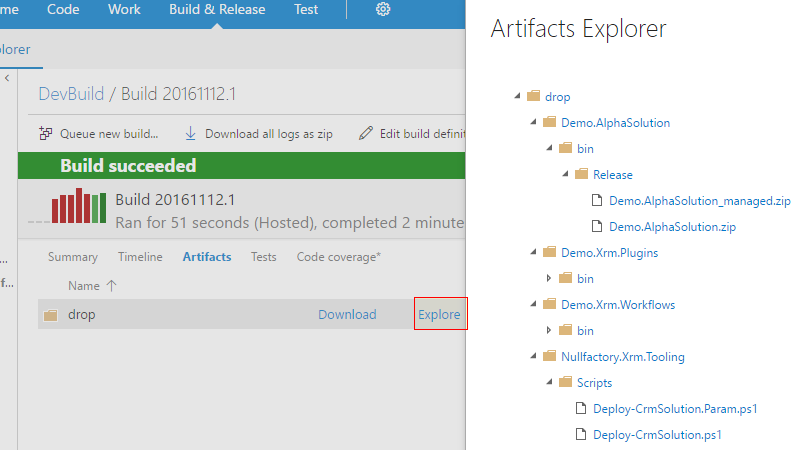
Congratulations! Now you have team build that builds and packages the Dynamics CRM solution. Go forth and extend the definitions to suit your particular development workflow.
In the next post I will show you how to setup a release management definition and automate deployment to Dynamics CRM environments.
comments powered by Disqus