Release Strategy for Dynamics CRM - Part 3 - Setting Up the Release
18 Nov 2016 | Dynamics CRM | Dynamics CRM Online | generator-nullfactory-xrm | Visual Studio Team Services | Team Foundation Server | ALM
This is the final installment of the a three part series. Use to following links to access part 1 and 2:
- Release Strategy for Dynamics CRM - Part 1 - Preparation
- Release Strategy for Dynamics CRM - Part 2 - Setting Up the Build
- Release Strategy for Dynamics CRM - Part 3 - Setting Up the Release
- Release Strategy for Dynamics CRM - Part 4 - Versioning
In the previous two posts I show you how to create the project structure and create a basic team build for your CRM solution artifacts. In this final installment I go about setting up a release definition for the build that we created.
- Let's start off by creating a new release by navigating to the
Build and Release > Releasein your team project. Select the
Emptytemplate option and click the next button.
On the next step, choose the source for this release - we'll be using the build definition that we created in part 2. Once ready click the
Createbutton.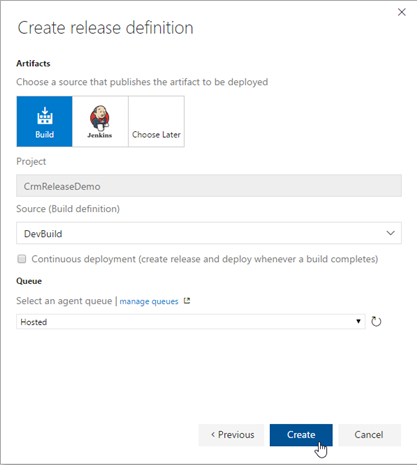
Now lets declare the variables that would be used later in the process. Navigate to the
Variablestab and define the following variables:DevDeployLogin- The username that used to deploy the solution.DevDeployPassword- The password for the same account.
Make sure to define the
DevDeployPasswordas a secret by clicking the padlock icon next to the field.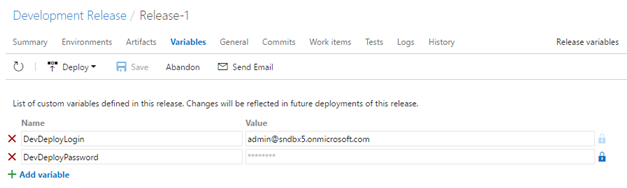
Read more about build and release variables here.
Next, create a new agent step by clicking the
Add tasksand selectingAdd an agent phasein the context menu.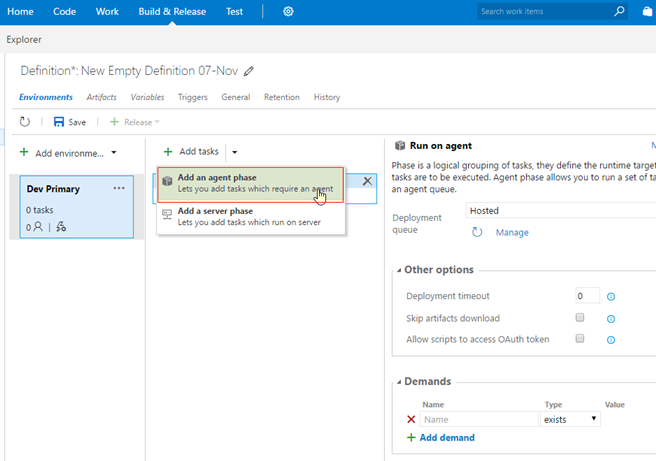
Select a
PowerShellin the task catalog and click theAddbutton.
Once the task is added, set the type to
Inline Scriptand add the following script in theInline Scriptfield:Install-PackageProvider -Name NuGet -MinimumVersion 2.8.5.201 -Force -Scope CurrentUserThe purpose of this script is to install the NuGet provider on the agent. This is a prerequisite of the
Install-Modulecommand that will be used by theDeploy-CrmSolutionscript.And while we're here, let's rename the task to a more appropriate one. This would help us to distinguish it better.

Now, add a second PoweShell script. This time set the type as
File Pathand rename the task toDeploy CRM Solution. This task would be performing the actual deployment to CRM.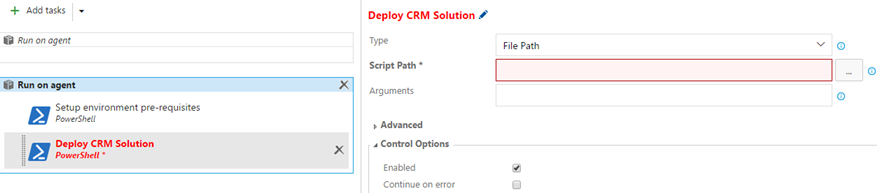
Click the ellipsis on the
Script Pathfield to browse and find theDeploy-CrmSolution.ps1script.$(System.DefaultWorkingDirectory)/DevBuild/drop/Nullfactory.Xrm.Tooling/Scripts/Deploy-CrmSolution.ps1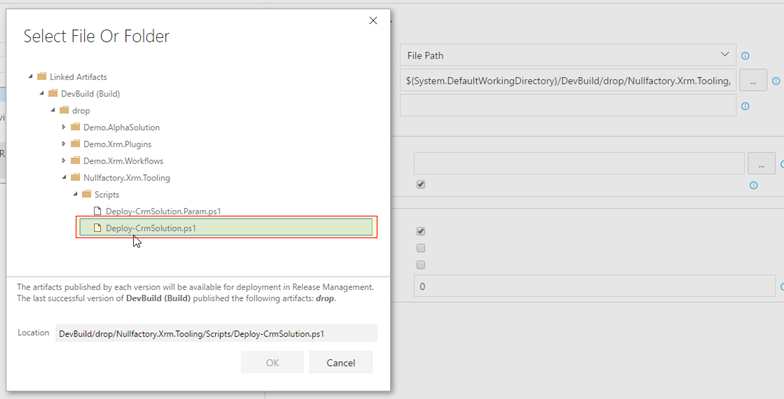
Set the following arguments for the script - notice that the previously defined variables
DevDeployLoginandDevDeployPasswordbeing used as part of the script.-serverUrl "https://servername.crm6.dynamics.com" -username "$(DevDeployLogin)" -password "$(DevDeployPassword)" -solutionName "Demo.AlphaSolution" -publishChanges -activatePlugins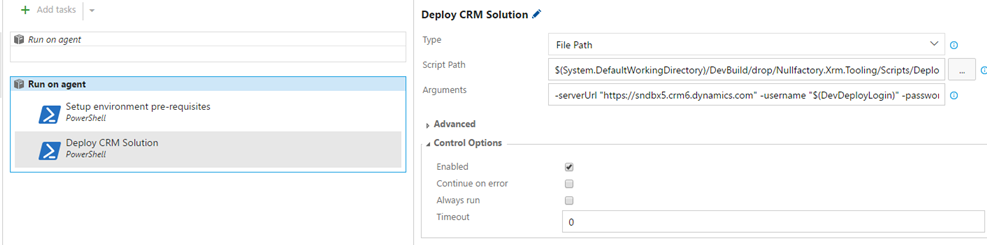
Expand the
Advancedtab and click the ellipsis button on theWorking Folderfield. Set the working folder to theNullfactory.Xrm.Tooling\Scriptsfolder on the resulting dialog. I do this in order to minimize the chance of encountering any long file path issues.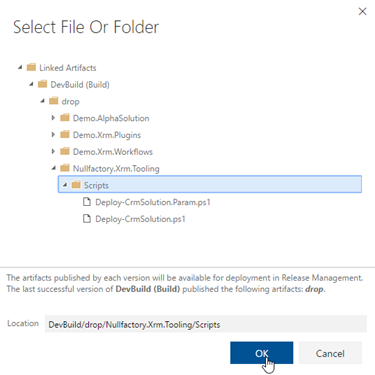
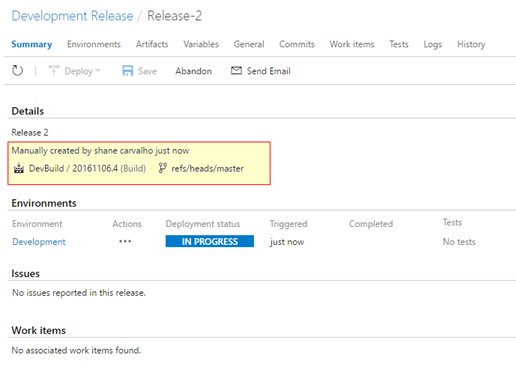
Now that everything is setup, time to test out our new release definition. Let's queue a new release.
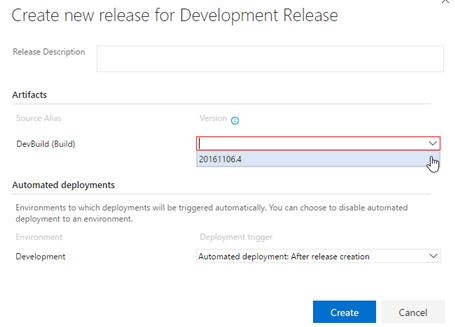
Ensure that the release is being deployed and that it completed successfully.

That's it folks. That's the end of the three part series showing how to setup a project structure, configure a build and finally release a source-controlled CRM solution.
References
- Create a release in Microsoft Release Management for Visual Studio Team Services and Team Foundation Server 2015
- Use build variables
- Use a PowerShell script to customize your build process
- How to deploy? Microsoft Release Management Tasks for Visual Studio Team Services and Team Foundation Server 2015