Deploy Dynamics CRM Solutions using VSTS and Octopus Deploy - Part 2 - Build
24 Apr 2017 | Octopus Deploy | Dynamics CRM | Dynamics CRM Online | generator-nullfactory-xrm | Visual Studio Team Services | ALM | Git
This is the second part of a series of posts where I attempt to deploy a Dynamics 365/CRM solution using Visual Studio Team Services (VSTS) and Octopus Deploy (OD). Previously, I setup an OD server and integrated it with VSTS - the steps describe in that post act as a prerequisite for this one. In this post we go about modifying an existing Dynamics CRM build definition to automatically package the release-artifact and upload it to the OD server for deployment.
Related posts from the series:
- Deploy Dynamics CRM Solutions using VSTS and Octopus Deploy - Part 1 - Setup
- Deploy Dynamics CRM Solutions using VSTS and Octopus Deploy - Part 2 - Build
- Deploy Dynamics CRM Solutions using VSTS and Octopus Deploy - Part 3 - Release and Deployment
Publishing Packages
There are a few different ways of getting a package into Octopus Deploy:
- Remotely upload a package to Octopus Deploy's built-in repository.
- Make octopus deploy pull packages from an external feed. Find more information here on setting up VSTS to publish an package feed.
- Manually upload the package into the built-in repository.
And the method of publishing the package has no bearing on the end deployment -I chose to explicitly push to the remote octopus deploy server.
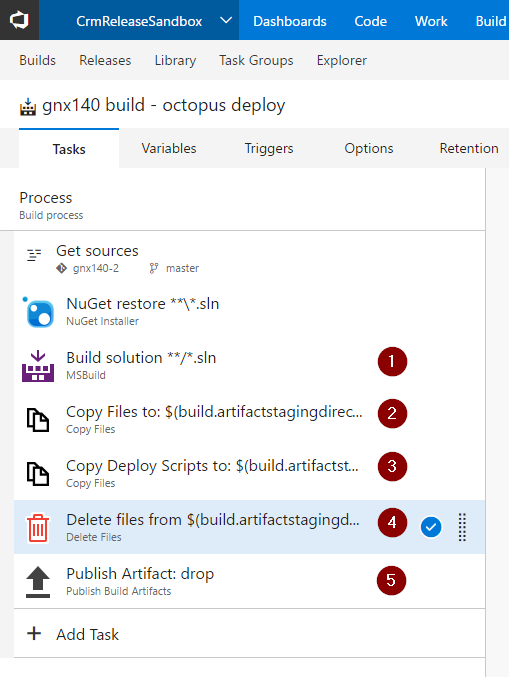
Updating the Build Definition
A quick summary of the notable steps in the existing build definition:
- The actual
msbuildcommand that is being used to build the solution. - Copy the built artifacts to the staging folder.
- Explicitly Copy Deployment Scripts into the staging folder.
- Delete binaries (such as plugins and workflows) that have already been packaged as part of the solution package. As these serve no purpose in the final drop, I explicitly delete them to reduce the file size.
- Publish the files in the staging folder into the final drop artifact.
Review my previous post on setting up the build definition here.
Now let's start implementing the changes to the definition:
Add the
Package Applicationtask.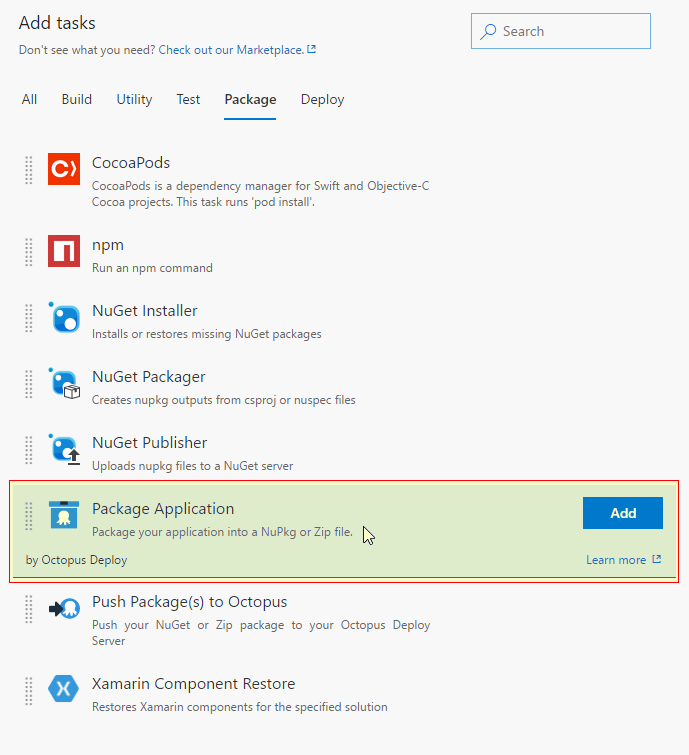
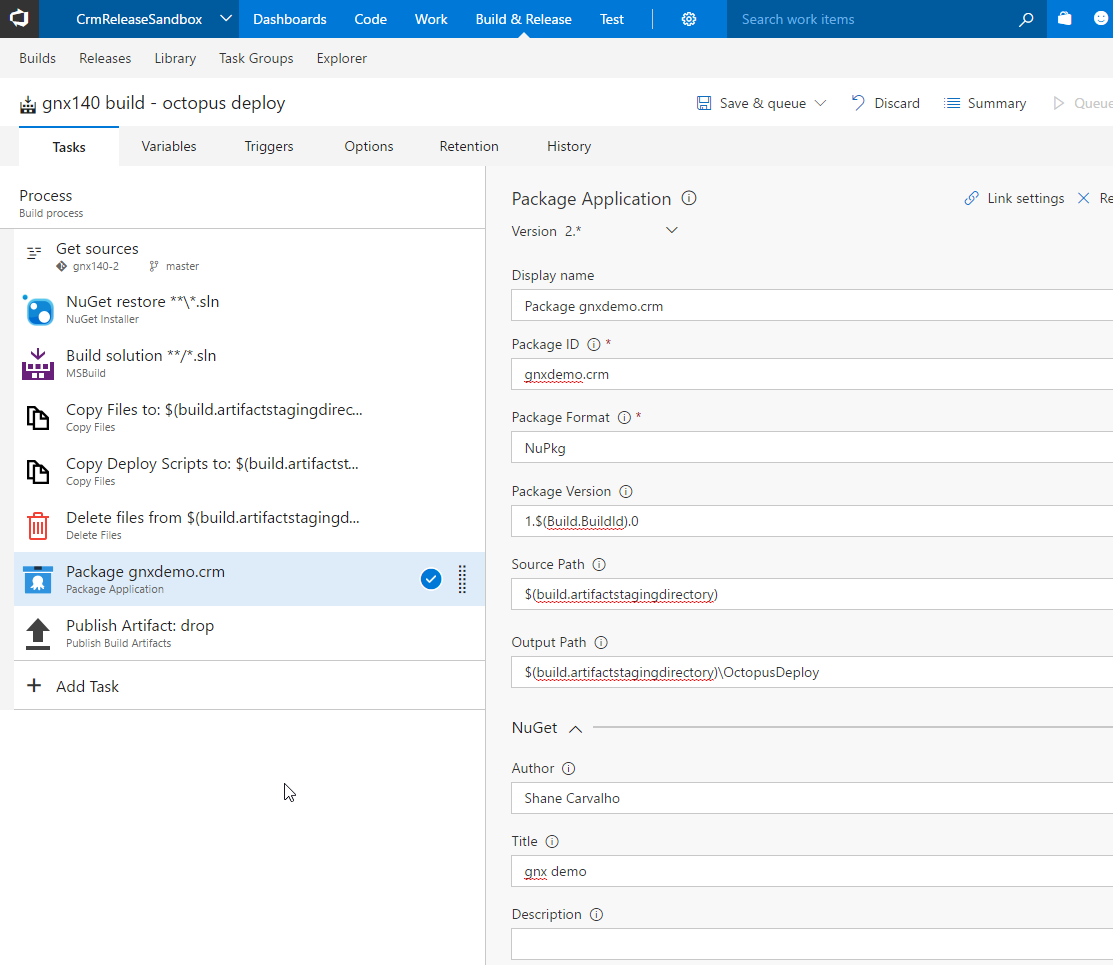
Configure the task by providing the following details:
Package ID: This is unique identification for the package. I providedgnxdemo.crm.Package Format: Choose between NuGet and Zip. I chose NuGet.Package Version: Configure this as appropriate. The generated package version should follow a valid SemVer versioning strategy.Source Path: Set this to the$(build.artifactstagingdirectory)Output Path: Set it to a dedicated folder within the staging directory. I used$(build.artifactstagingdirectory)\OctopusDeploy
Next, add the
Push Packagetask.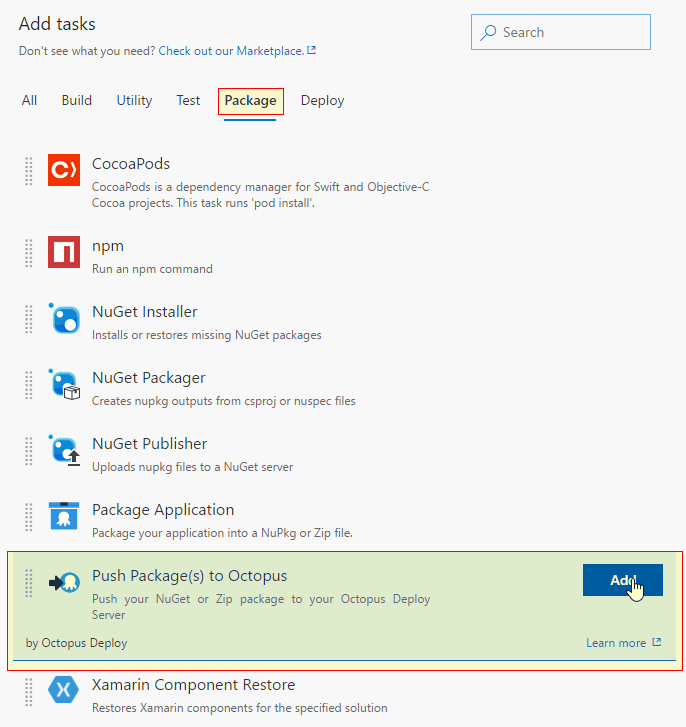
Configure the task by providing the following details:
Octopus Deploy Server: Choose the available server.Package: This is the location of the package file. Since I am only creating a single package I setup the path resolution using a wildcard$(build.artifactstagingdirectory)\OctopusDeploy\*.nupkg

Remove the
Publish Artifact: droptask as it is no longer necessary.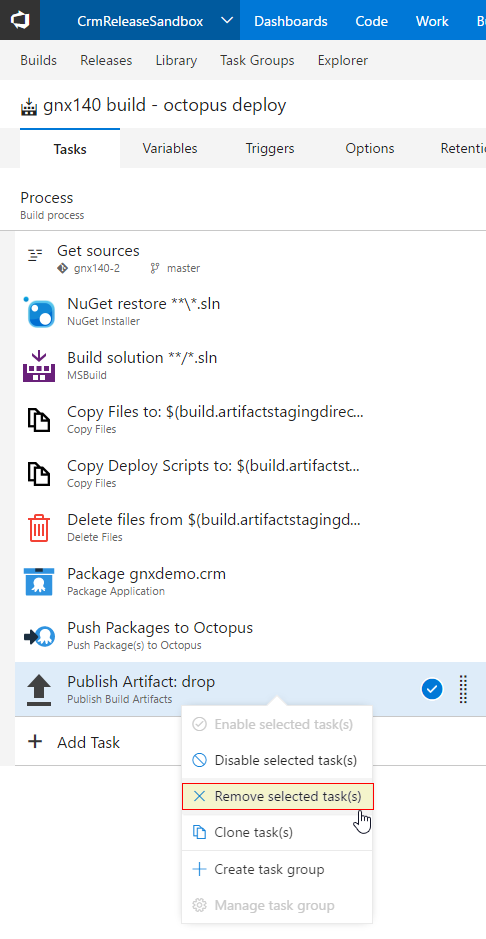
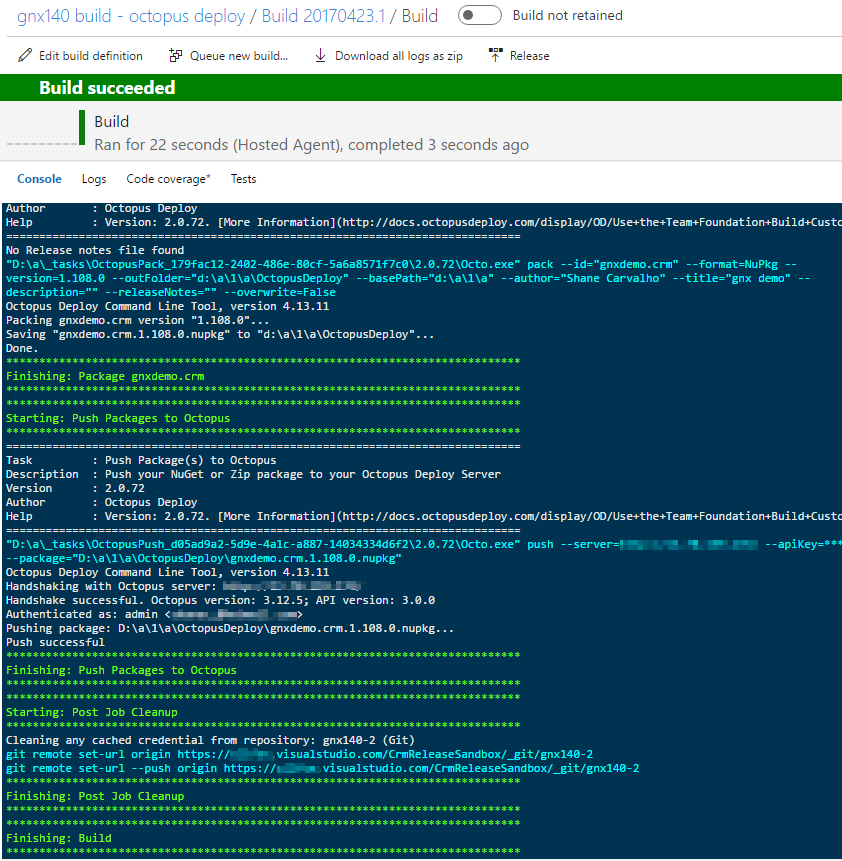
Queue a new build to make sure that everything is in order.
Log into the Octopus Deploy admin panel. Navigate to the
Library > Packagesand ensure that the package has successfully uploaded.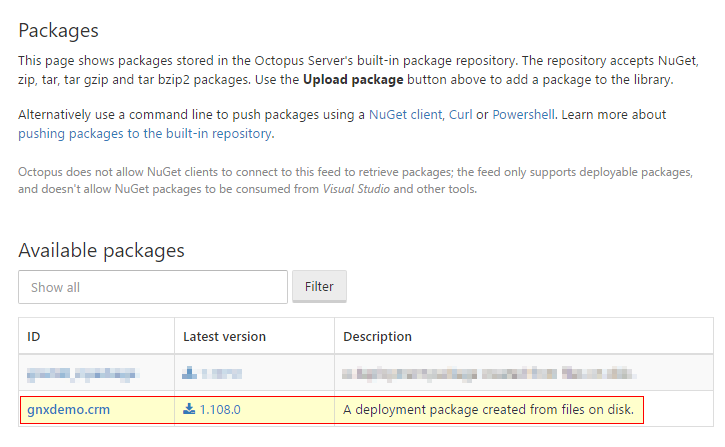
That completes the changes to the build definition. In the next post I will go about configuring the environments, project definition and the deployment process within Octopus Deploy.
References
- Using the Team Foundation Build Custom Tasks - Octopus Deploy
- Package Management in Team Services and TFS