Deploy Dynamics CRM Solutions using VSTS and Octopus Deploy - Part 1 - Setup
23 Apr 2017 | Octopus Deploy | Dynamics CRM | Dynamics CRM Online | generator-nullfactory-xrm | Visual Studio Team Services | ALM | Git
I have seen Octopus Deploy (OD) being mentioned frequently in the community but haven't had a chance to play around with it myself. Therefore, I think that attempting to deploy a Dynamics 365/CRM solution using Octopus Deploy seemed like the perfect exercise to learn more about the platform and its features.
I was curious if there were other developers who have released Dynamics CRM using Octopus Deploy and sure enough there was some one who had already thought of that.
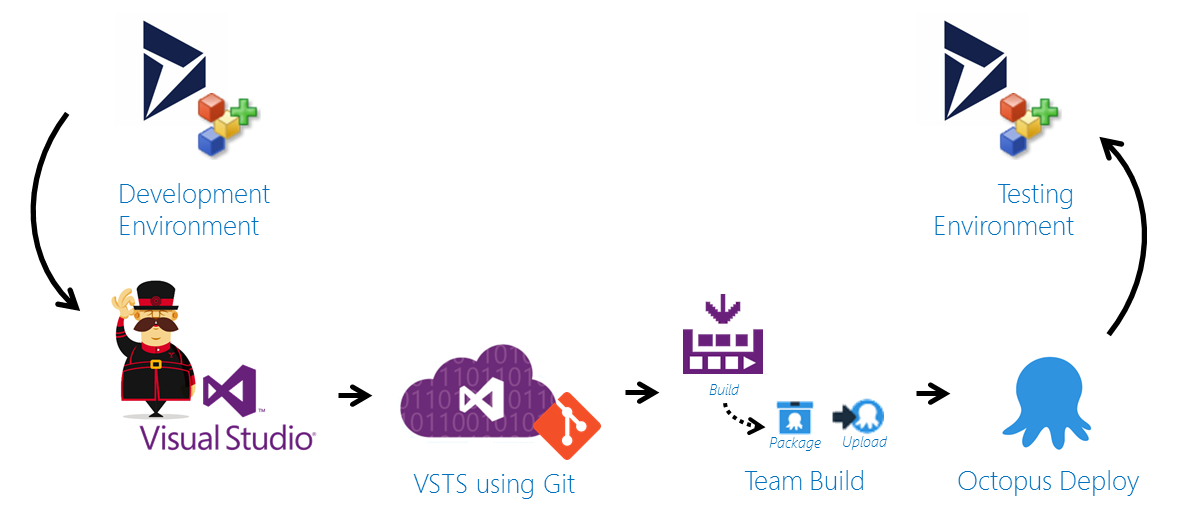
In this series of posts I try to cover everything from setting up integration with Visual Studio Team Services(VSTS), updating a build definition to automatically publish itself and then finally setting up a simple release and deployment pipeline.
Related posts from the series:
- Deploy Dynamics CRM Solutions using VSTS and Octopus Deploy - Part 1 - Setup
- Deploy Dynamics CRM Solutions using VSTS and Octopus Deploy - Part 2 - Build
- Deploy Dynamics CRM Solutions using VSTS and Octopus Deploy - Part 3 - Release and Deployment
Prerequisites
- Project structure and deployment scripts based on generator-nullfactory-xrm (with a minimum version of at least 1.4.0). Read More
- The project checked into Visual Studio Team Services (VSTS) using either
gitortfsvcwith a working team build already setup. Read More. - Installation of Octopus Deploy and ensure sure that it is publicly accessible. Read More.
The Strategy
When I saw the integration tasks provided by the OD extensions for VSTS, my first reaction was to divide the tasks between the build and the release in VSTS. I wanted to the the build definition to build and package the solution and pass it on to release management. Release management would then publishing the release-artifact to OD and explicitly remote trigger the OD deployment.
While it was certainly possible to set this up, its did not make sense to have two deployment services for the same pipeline. Therefore the strategy is going to be very similar to the one that I had done previously - VSTS would continue to act as the version control and build server but this time Octopus deploy would act as the release component.
The build server would handle creating compatible package and uploading it to the OD package repository. And OD takes over the management of the environment, release and deployment complexities.
Integrate Octopus Deploy with VSTS
Let's start of by integrating OD with VSTS.
Log into the Octopus Deploy admin panel with an user account that has enough permission to generate an API key.
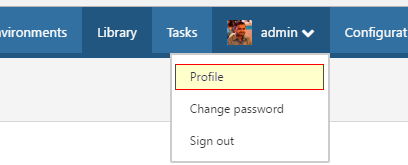
Click on the
Profileand navigate to theAPI keystab and generate a new API key.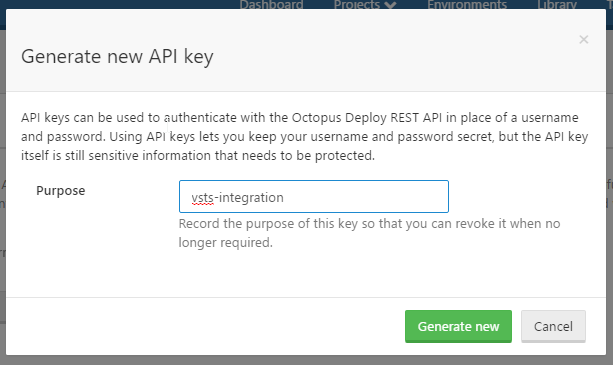
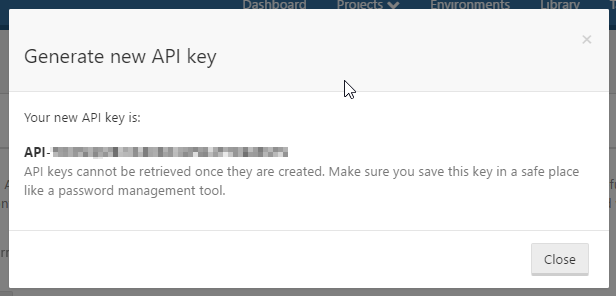
Copy the newly generated API key.
Next, log into VSTS using the project collection administrator account.
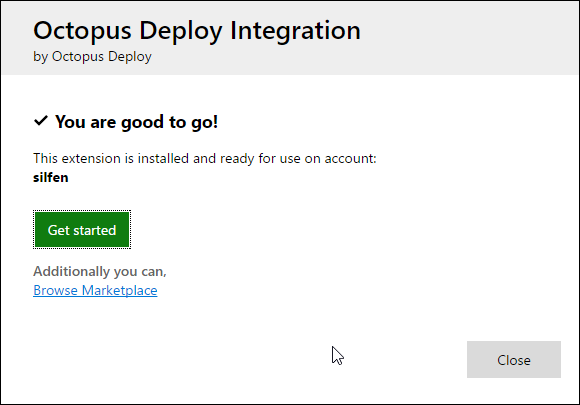
Install the Octopus Deploy Integration extension.

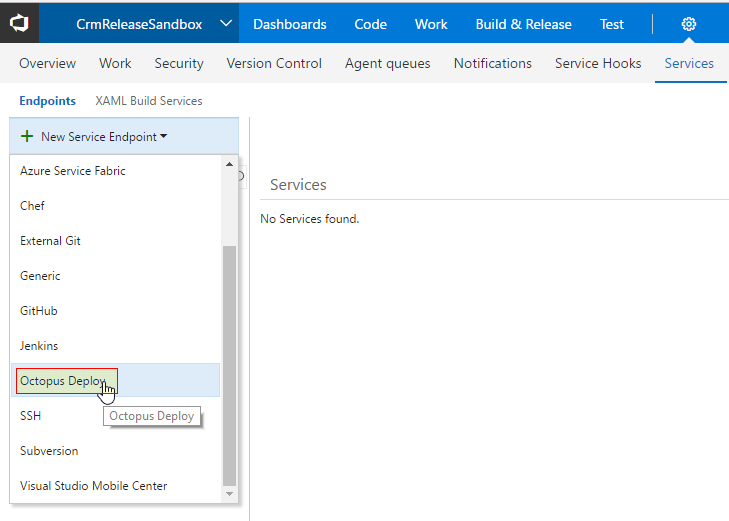
Next, we create a OD connected service that would expose the build tasks required by the team build. Let's start off by navigating to the
Settings > Servicestab.- Clicking on the
New Service Endpointunder theEndpointstab. - Select
Octopus Deployfrom the list.
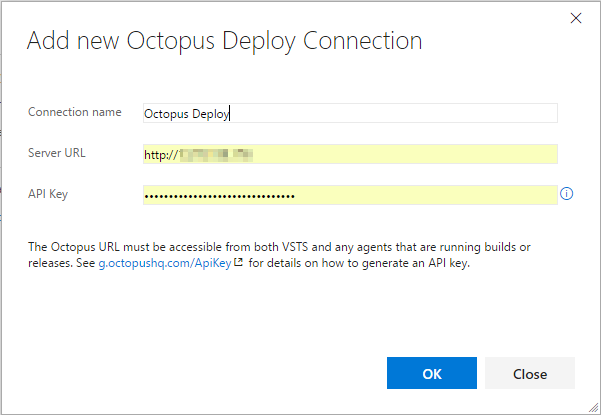
- Provide the details of your OD environment and previously generated API key.
Now that the VSTS environment is connected with OD, we move onto working on the build definition. In my next post I will go about updating a previously setup build definition to automatically package the solution and publish it to Octopus Deploy.
References
- July 2016 Meeting - Automated Deployment in CRM Using Octopus Deploy - YouTube
- Get extensions for Visual Studio Team Services | Visual Studio Team Services
- Using the Team Foundation Build Custom Tasks - Octopus Deploy
- How to create an API key - Octopus Deploy
- Octopus 3.0 part 1: Introduction - YouTube
- Octopus 3.0 part 2: Installing the Octopus Deploy Server - YouTube