Continuous Integration and Continuous Delivery of Dynamics 365 Solutions using VSTS
25 Jun 2017 | ALM | Visual Studio Team Services | Dynamics CRM | Dynamics CRM Online | Git
In previous posts I've setup build and release defintions for Dynamics CRM solutions and in this one I try my attempt at setting up an automated Continuous Delivery pipeline. There are two popular strategies used to make sure that every change made to a system can be deployed successfully to secondary environment:
Continuous Integration (CI)
A CI build is one that is usually kicked off any time a piece of code is checked-in in order to give early visibility of any potential failures. The success of a build is dependent on the actual build plus any unit tests.
Scheduled
A scheduled build, also commonly referred to as a
Nightly Build, is a build and release that is performed on a regular cadence - usually every night. Once again, on the successful completion of the build and automated unit test, a new release is pushed to the staging environment.
Both methods appear to be doing the same thing, so when should I choose a CI build + release over a scheduled build? The most common metric appears to be the duration of your build and unit tests. The size of the team, the project and code complexity and the frequency of check-ins can have an impact on the time it takes for build and long running unit tests to execute. In these scenarios a Scheduled build makes more sense.
Overview
I was disappointed to find out that, at the time of writing this post, VSTS release definitions does not provide an option to trigger off a successful a scheduled build. The only options available are to trigger it off of a CI build or the automated schedule on the release itself.
Luckily, Rene van Osnabrugge's excellent post provides us with a workaround for this restriction. Here's an overview how it works:
- Setup a single build that performs all three roles (manually invoked, CI and scheduled).
- Add a task into the build that would to figure out which method was used to invoke.
- Apply the the reason as a build tag onto itself.
- Update the release definition to filter the the release trigger to be filtered only the scheduled tags.
Lets get started setting it up.
Prerequisites
- Visual Studio Team Services
- Existing team build - I will be re-using a Dynamics CRM project that I have used in my previous post.
- Existing release definition - Once again, I am using one that I've setup previously.
The Build Definition
As in my previous posts I will be using a standard Dynamics CRM build for this demonstration. Follow the instructions in my previous post for setting this up .
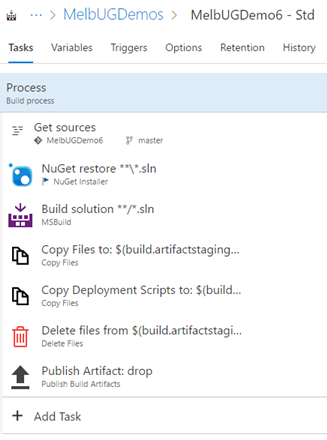
Now let's make the following modifications:
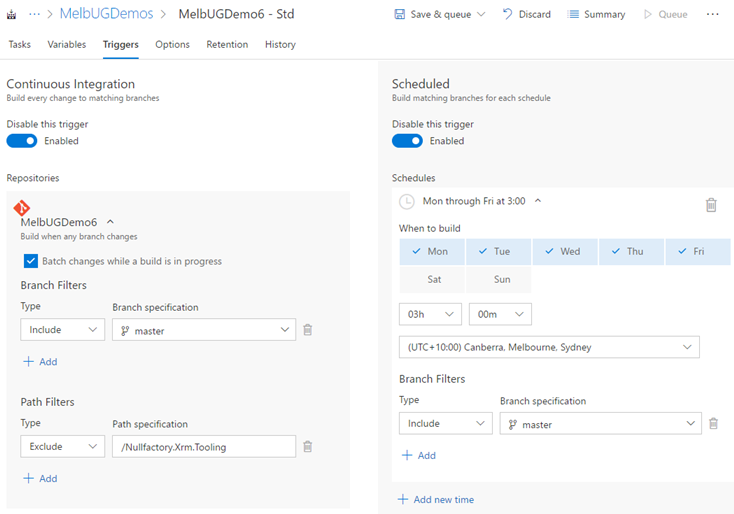
- From within the build definition, navigate to the
Triggerstab. - Enable the Continuous Integration trigger.
- Check the
Batch changes while a build is in progresscheck box. - Add a new Path filter by clicking the
addbutton. - Set the type to
ExcludeandPath specificationto/Nullfactory.Xrm.Tooling. We don't really care for our tools to This is so that we only trigger on the actual solution and not the supporting tools/project. - Now enable the scheduled trigger.
- Provide a schedule that works for your team.
- Finally, save the changes.
Tagging The Build
Next, we update the build to tag itself upon a successful build.
- I downloaded the Set-BuildTagToTrigger.ps1 script and added it part of the
Nullfactory.Xrm.Tooling/Scriptsproject folder. - Commit and push the changes to the remote repository.
- From within the build editor, click on the
Add Taskbutton and select a PowerShell task. I placed it as the last step in the order. Configure it with the following values:
- Display Name :
Tag Build Reason - Type :
File Path - Script Path :
Nullfactory.Xrm.Tooling/Scripts/Set-BuildTagToTrigger.ps1 - Arguments :
-BuildId $(Build.BuildId)
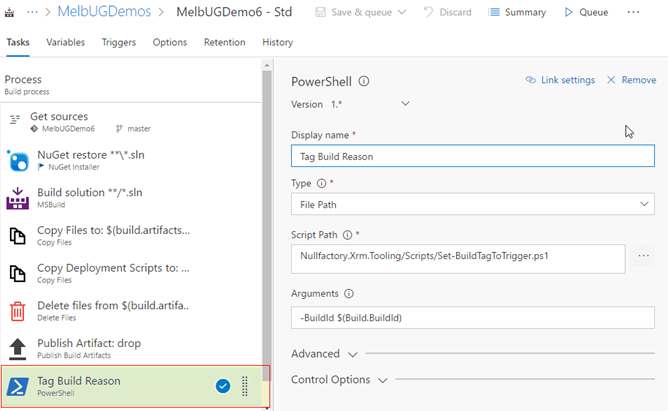
- Display Name :
Ensure that the task only runs if all previous tasks have succeeded. Do this by navigating into
Control Optionssection and selecting the option within theRun this taskdrop down.In order for the the script to have authenticated access to the REST service it requires access to the OAuth token. Do this now navigating to the
Optionstab and enabling theAllow scripts to access OAuth token.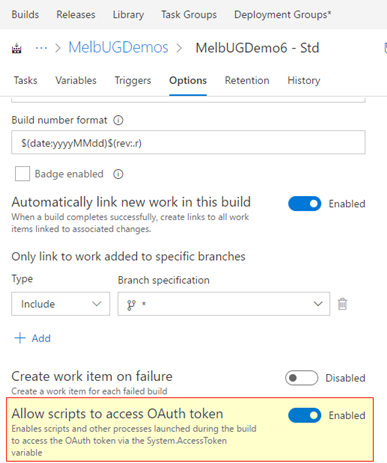
Queue a new build and verify that a tag was associated with the build. Note that since we invoked the build explicitly, a
manualtag was added.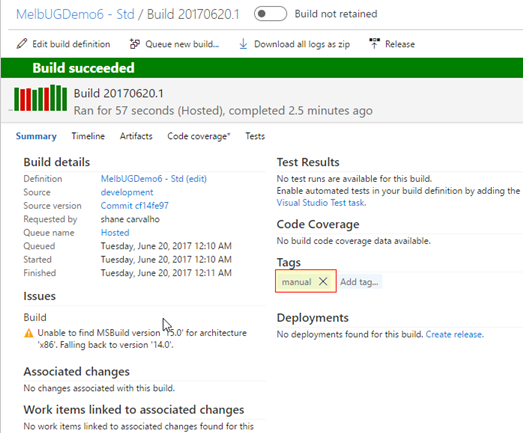
The tags applied to the new build are the same values as the build reason environmental variable. We only care about the following scenarios:
ManualIndividualCIBatchedCISchedule
In fact, we only care about the Schedule typed of builds. Find the full list of available values here.
The Release Definition
Now that the build is complete and we've proven that the solution is good enough to be deployed, let's create and augment our release definition.
Follow the steps described here to create the basic release definition. Ensure that the linked source is the build definition we created earlier.
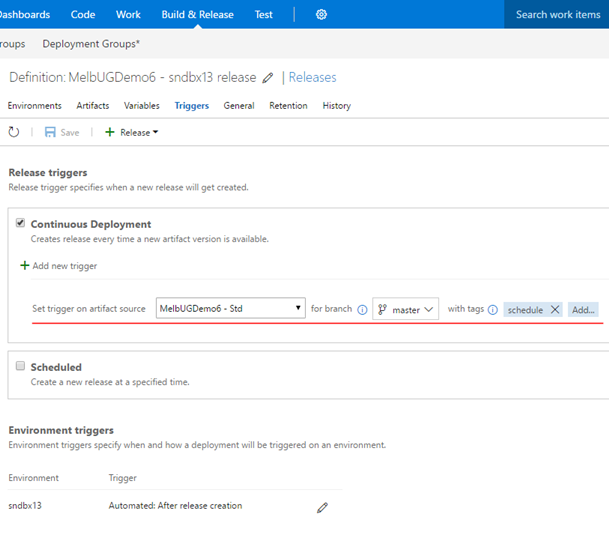
- From within the release definition edit screen, navigate to the
Triggersmenu. - Check the
Continuous Deploymentcheck box. - Select the build as the source from the drop down and the branch it should monitor.
- Add
scheduleas the tag filter. - Click
Saveto confirm changes.
Verification
Verify that the when the build is triggered via the schedule and that it has a
scheduletag is associated upon completion.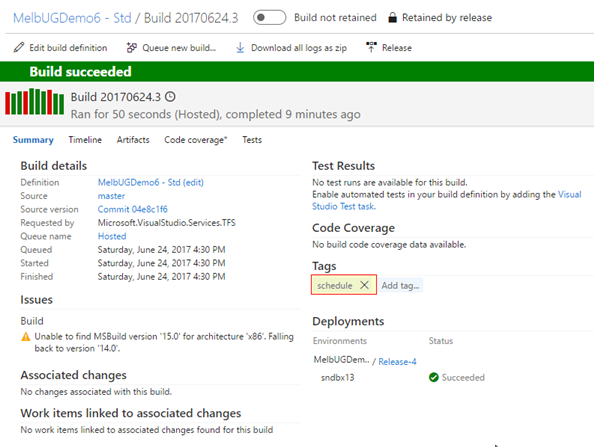
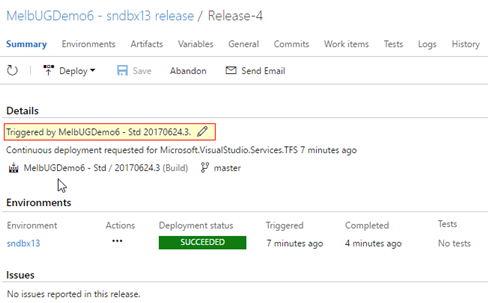
Verify that a release was deployed off of it.
References
- What is Continuous Integration? | DevOps
- What is Continuous Delivery? | DevOps
- Continuous Delivery Vs. Continuous Deployment: What's the Diff? | Puppet
- Continuous Integration vs. Nightly Builds - Stack Overflow
- Build definition triggers
- Trigger Release Pipeline only for Scheduled builds | The Road to ALM
- Use a PowerShell script to customize your build process
- Build variables